Installing Docker on a Raspberry Pi
- 3 minstitle: “Installing Docker on a Raspberry Pi” layout: post date: 2016-03-21 00:00 image: /assets/images/markdown.jpg headerImage: false tag:
- docker
- containers
- rPi category: blog author: edmorgan description: Installing Docker on a Raspberry Pi
jemoji: ‘
 ’
’
This post was previously hosted on a different site and then migrated here.
I could probably assume that everyone reading this knows what Docker is, but just incase anyone has been living under a rock for the past 18 months here’s a quick introduction direct from Docker[dot]com:
Docker containers wrap up a piece of software in a complete filesystem that contains everything it needs to run: code, runtime, system tools, system libraries – anything you can install on a server. This guarantees that it will always run the same, regardless of the environment it is running in.
Useful, no?
Now, I’ve had a Rasperry Pi sat on my desk for the best part of 2 years and all I’ve got around to doing with it is installing XBMC and not displacing my Apple TV with it, so when I found out I could put Docker on it that seemed like a valuable way of wasting an afternoon…
From a hardware standpoint, you’ll need either a gen 1 or gen 2 Rasperry Pi, and an SD card. The glorious chaps at Hypriot have created an image that’s ready to be flashed onto your Pi.
Grab the latest image from here, and unzip it.
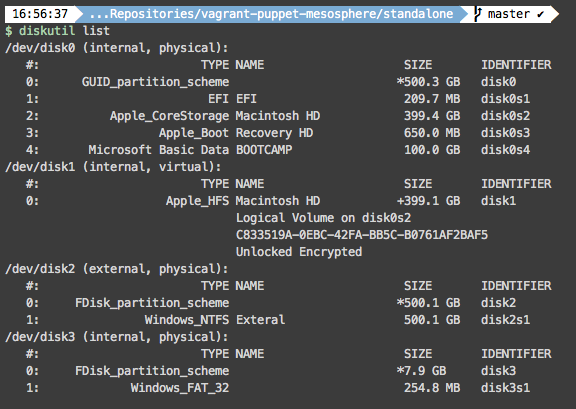
Once that’s extracted open up your terminal app, and type diskutil list
You should see your SD card listed (it’ll probably be the smallest one), in this case it’s /dev/disk3
To flash the image, you’ll need to unmount the SD card - diskutil unmountdisk /dev/disk3

Flash the image with the following command (ensure to change file paths to ones local to your system…) -
sudo dd if =/Users/ed/Downloads/hypriot-rpi-20151115-132854.img of=/dev/disk3 bs=1m
This could take a few minutes, so go and make a coffee or eat a cookie or something while you wait… When it’s completed you should see something similar to this:

Now unmount the SD card again, plug it into your Pi, and plug the Pi into the power and the network..
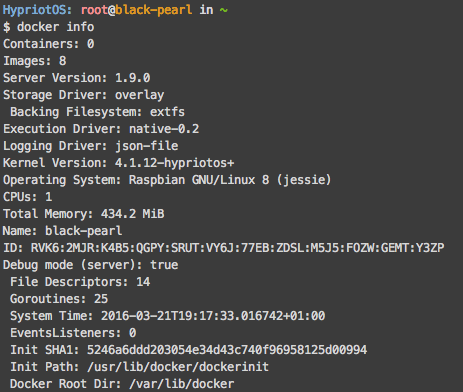
Give it a few minutes to boot, and then connect to your Pi via ssh. Run the following command to check that the Docker service is running - docker info
All being well you’ll see the following:
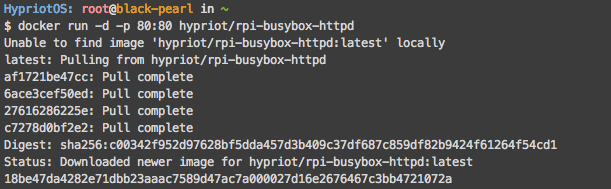
Huzzah! Now let’s grab a Docker image to prove that it works. For the purposes of this example I’m going to grab a webserver from the Hypriot Docker Hub -
docker run -d -p 80:80 hypriot/rpi-busybox-httpsd
This’ll pull the image from the Docker Hub, and start it up.
You can see what containers are running with the docker ps command, but browse to the Pi’s IP address with a web browser to check the https container has started and is serving web pages.

There’s all sorts of cool things you can do with Docker on the Pi to get a grip of how it works, and if you want some fun ideas I would take a look at Jess Frazelle’s blog. There’s plenty of packaged Docker images at the Docker Hub, too, so go crazy.